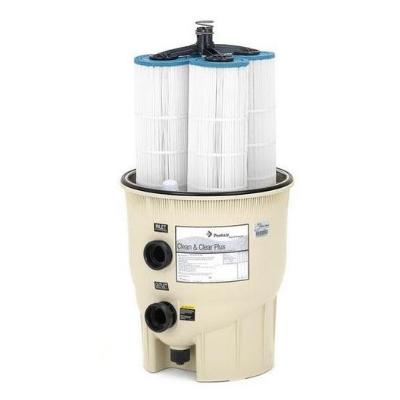
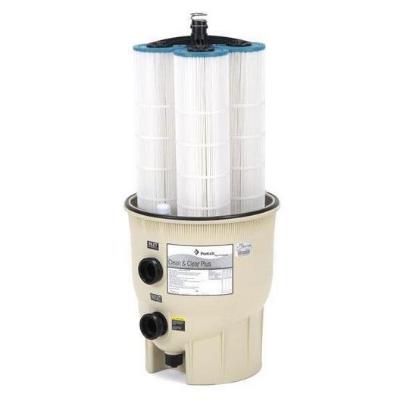
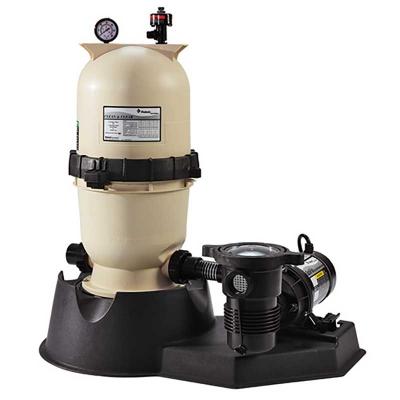
Pentair’s primary range of cartridge swimming pool filters is the Clean and Clear Plus series. It’s highly probable that the water in your pool is filtered by one of these filter types. Pentair is frequently the preferred brand for pool builders and repair services, particularly if you’ve purchased a new filter or even a new pool within the last ten years or so.
It is true that all cartridge filters have essentially the same technology—I have cleaned thousands of cartridge pool filters throughout my time. Thus, this post will assist you in maintaining the functionality of your filter, irrespective of your model.
There are primarily two kinds of cartridge filter styles in use. The four-way style comes in sizes ranging from 300 to 500 square feet. Next, there are variants with a single cartridge that might be as little as 50 square feet or as large as 250 square feet. In this post, we’ll concentrate on the four-way versions. Pentair’s Clean and Clear Plus, 240, 320, 420, 500, and 520 square foot models, to be exact.
Preparing For Cleaning:

Before disassembling and cleaning a Pentair Clean & Clear Plus filter, inspect it
I like to assess the situation first before diving into any filter. Therefore, when you go closer to the filter tank, let me first point out every component. While many people prefer to work their way down, in this instance, I want to work my way up.
The bottom tank of the filter canister makes up the tank base of each of these devices. There is an O-ringed drain plug and its accompanying plug near the bottom of the tank (under the piping for units built after 1998). From there, the plumbing is routed via the inlet and output bulkhead fittings using union style connections, along with every O-ring. The metal clamp band that holds the two sections together has one barrel nut tension spring assembly; early models might have had two barrel nut assemblies. The top portion of the canister or the tank cover will be next to come. A pressure gauge assembly and combined pressure release valve are fastened to the top of the tank lid.
Before disassembling everything, it’s crucial to make a mental or physical image of where each moveable component is supposed to be because one mistake could have disastrous consequences.
Ho Can The Filter Cartridge Tank Be Opened Safely?

Make sure all energised or possibly energised equipment is de-energized before doing any maintenance on it.
Make sure all of the pumps are off and will stay that way throughout. I always assume that something will break and I’ll have to go to the shop, so I always switch everything off at the breakers in case the timers decide to go off without warning.
The next action is to release the stored energy within the tank by turning the High Flow manual air relief valve, located at its top, ½ turn counter-clockwise.
In order to empty the tank of water, air must be drawn into it. In the event that water leaks out, ensure that all pumps are off and close any valves that separate the pool from the machinery. To empty the water from the tank, you might need to unscrew the drain plug located at its base if there is no movement in either direction. Ensure that there is no pressure in the tank before proceeding with this action. Watch out for the O-ring.
We can safely open the filter now that the pump and filter have been de-energized.
Pentair Clean And Clear Plus Pool Filter: Opening The Tank
The size of the Pentair Clean and Clear Plus is between 240 and 520 square feet. The height of the external body, which is directly correlated with the internal cartridge length, is the only difference between the sizes. Thus, the tank will be split precisely the same way. To ensure everything is operating properly, it’s a good idea to thoroughly inspect everything as it passes through the filter. Fear not—I’ll explain how.
Shaft Nut And Stress Spring Assembly:
To fully undo the barrel nut and tension spring assembly, a 3/4-inch socket or wrench is required. Be careful to record the washers’ respective orders.
Band Clamp:
Take the band clamp off of the filter’s circumference. The clamp likes to jump off and fall, so use caution.
Lid For Tank:
Raise the lid to cover the top of the cartridges within. The tank top can break easily, so take care not to lift it off the air bleeder and pressure gauge assembly. Place the lid aside for inspection and cleaning after it has been fully removed.
Cleaning Of Main Cartridges:
The four cartridges that require cleaning will now be visible to you. If this is your first time, you might wish to quickly snap a photo of the assembly as it is assembled. Examine everything: the centre tube and breather screen should be intact, the top manifold should be tight, and all four cartridges should be vertical.
A sizable plastic manifold holding the four cartridges together should be visible at the top of the four cartridges. An air breather screen will be fixed to a white pipe that runs along the middle. The screen prevents debris in the filter from returning to the pool through the breather/bleeder tube when the pump activates this tube, allowing air to automatically bleed from the filter.
Breather/Bleeding Screen:
Take out the breather screen, which can be easily cleaned and put back in. These screens are prone to crushing, therefore, you should check their integrity. These are reasonably priced and accessible at any pool supply store in case they are beyond repairable crushing. However, do not use the filter without one.
Manifold For Top Filter:
Remove the upper manifold next. You can just get hold of it and jiggle it from side to side to free it from the four cartridges when they become trapped due to pressure. You can’t break much at this point, so don’t worry. Just give it a nice shake and take the manifold straight off. Examine the filter top manifold briefly to check for any integrity problems, such as cracks. These are under a lot of pressure, thus irregularly coloured patches are frequently an indication that the plastic is beginning to fail. Once the cartridges have been cleaned, lay it aside to be replaced.
Body O-Ring:
Take off the O-ring around the cartridge canister’s diameter, where the two sides join. Examine the O-ring for fractures. In the event that an O-ring cracks, replace it. Prior to replacement, o-rings should always be lubricated with silicone or Teflon-based lubricant. Ensure that the mating surfaces are also spotless.
Cartridges For Filters:
Cartridges are taken out of the canister base one at a time by lifting them straight out. I always give the cartridges a thorough inspection before cleaning them since I don’t want to waste my time cleaning them if they need to be changed. Examine the end caps (both ends) for any signs of separation from the media or centre pipe, as well as any cracks or significant discolouration. Examine the bands surrounding the press.
Usually, the cartridge needs to be changed if the bands are damaged or loose. Lastly, take a look at the paper medium. If the pleats seem ripped or lacking in crispness, it’s time to replace them. For four-way cartridge filters, cartridges should typically last four to five years if they are serviced appropriately and at the appropriate intervals.
Cleaning The Cartridges:
If the muriatic acid solution stops bubbling, immerse the cartridges in a pail of water if they appear to be in good condition. I switch them around as I clean. Clean each pleat thoroughly from top to bottom using a pressure washer or a high-pressure nozzle connected to a garden hose. The filter ought to approach near-whiteness. Until the water that flows out is clear, clean the filters. If the cartridges don’t turn back to white, it could be because there is a lot of debris lodged in them, which is another indication that it’s time to change them.
Cartridge Filter Assembly Following Cleaning:

Examine the lower portion of the filter tank body for a moment before simply reassembling everything. You might need to run some water through and give everything a thorough rinse if there is any material lodged at the bottom. If the bottom drain is left open, everything will simply flush out. Replace the drain cap and lubricate the O-ring.
Check for fatigue or any cracks in the bottom manifold. Examine the tank to make sure the same issues are there. Start reassembling the Pentair Clean and Clear Plus pool filter if everything appears to be in order.
Body O-Ring:
Ensure that the lower tank’s body O-ring is lubricated and positioned correctly. When the cartridges are removed from the filter, this process is far simpler and cleaner.
Change The Cartridges:
Assign each filter 1 through 4 to the appropriate location on the lower manifold. Pressing down forcefully should cause the cartridge to slip over the coupler and snap slightly. The four cartridges should remain upright and at the same height when in place.
Top Mainfold:
Position the top manifold so that it covers the top of the cartridges. To ensure that the bleeder pipe aligns appropriately, you might need to orient it. If not, the manifold is upside-down. The manifold should need to be forced down onto the four cartridges. Firmly press the manifold down. The four cartridges ought to function as a single, cohesive unit. Verify that the centre bleeder pipe has the bleeder filter on it.
With the cartridges all in their proper positions, the top tank is now prepared for use. Make sure you check the tank top for any damage or material fatigue before replacing it. To prevent leaks at the O-ring, clean the mating surface.
Tank-Top:
Place the new tank top on top of the assembled cartridge. In order to avoid pinching or compressing the O-ring or unintentionally pushing it off course, attempt to place it uniformly over the mating surface. After briefly closing the air bleeder valves, turn the lid to make the pressure valve easy to see. Verify that the valve for bleeding is open.
Barrel Nut Assembly With Band Clamp:
This portion can occasionally be a little tricky. Make sure there is no space between the two halves by pressing down on the tank top. Next, rapidly wrap the band clamp around the joint’s perimeter. Position the barrel nut assembly in place and begin threading it. This can usually be manually tightened. After that, make sure everything is lined up. After alignment is verified, I like to tighten the barrel nut using an impact gun fitted with a ¾-inch socket attachment. After the barrel nut assembly is tight, seat the band clamp with a rubber mallet and tighten it again. Repeat as necessary until the barrel nut assembly’s spring coils are in contact with one another and remain that way even after a mallet blow to the band clamp.
Bleeding The Tank:
Open all valves that were closed during disassembly, even if you’re not sure everything was put back together correctly. Re-energize the breakers. Ensure that the Clean and Clear Plus Cartridge Filter’s bleeder valve is open. Step back and activate the primary filter pump.
Safety Precautions:
If something malfunctions, trapped air in a filter can be extremely harmful, and you don’t want to be close to it. You will hear the filter fill up when air is forced out of the air bleed valve. Close the valve as soon as water starts to stream out.
FAQs:
Does Pentair Have A Huge Filter Area That Is Clean And Clear?
A cleaning is necessary if the pressure gauge indicates that the system is operating at a pressure that is 10 PSI greater than its initial pressure. Pentair Clean & Clear® Plus Cartridge Filters include a large filter area to maximise dirt capacity.
What Is A Pool Filter Made Of Pentair Cartridges?
Pentair’s primary range of cartridge swimming pool filters is the Clean and Clear Plus series. It’s highly likely that one of these filter types is probably the water in your pool.
Is Pentair A Reliable Brand Of Pool Filters?
It’s highly likely that the water in your pool is filtered by one of these filter types. Pentair is frequently the preferred brand for pool builders and repair services, particularly if you’ve purchased a new filter or even a new pool within the last ten years or so.
Conclusion:
With its large surface area, the Clean & Clear Plus filter can trap more debris and particles, allowing you to go longer between cleanings. Also, to make the cartridge last longer, we use the best materials. Every day, your pool will remain clean and sparkly thanks to the Clean & Clear Plus filter’s commercial-grade performance.

