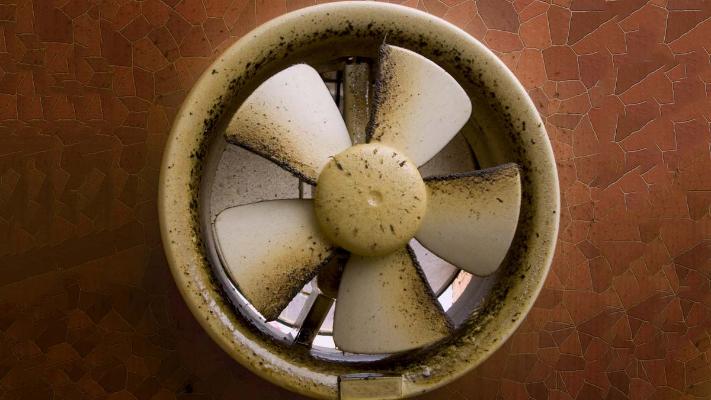
As you cook, a kitchen exhaust fan eliminates odours, smoke, oil, and steam from the air. This grease and particles accumulate in the filter over time, gradually reducing the fan’s performance and ultimately posing a fire risk. Fortunately, dish soap, baking soda, and a sponge are all you need to clean your kitchen exhaust fan.
Make sure your range hood filters are kept properly, even though it might not seem like the ideal use of your time.
If you’re a typical homeowner, that is undoubtedly a lot of cleaning. The majority of people, some even going back ten years, have never cleaned their filters. However, claiming to be an authority on range hoods.
You should clean your filters on a regular basis for the following reasons:
- Enhanced energy economy
- Extended lifespan of the fan
- Removing grease and smoke effectively
- Simpler upkeep and safety.
Can You Clean Every Filter?
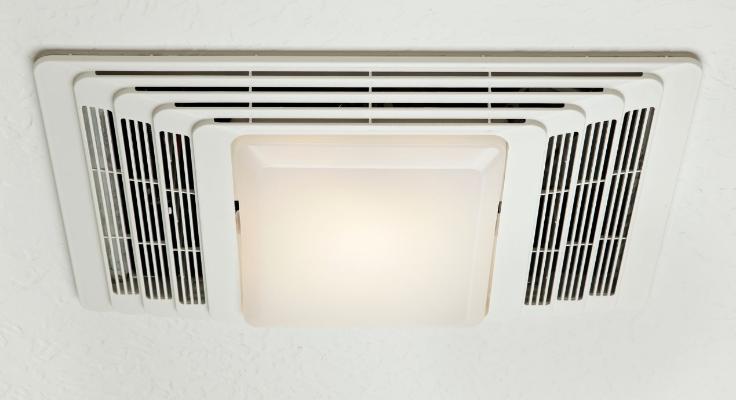
Most range hoods have one of three types of filters:
- Grease filters made of fabric
- Grease filters made of metal
- Filters made of charcoal
As the name implies, the only function of grease filters is to filter out grease and oil vapours. Except for a few earlier models, they are found in every range hood.
Similar to a sponge, fabric grease filters function by absorbing grease and smells; they must be replaced rather than cleaned. Grease filters are made of metal cans and should be cleaned frequently. Usually made of aluminium, but occasionally stainless steel is used. They are typically visible at the base of your range hood and are either mesh or baffle filters.
Only ductless versions will have charcoal filters because their primary function is to remove smoke and odour. This step is only required if you are returning the air to your kitchen. It is not possible or should these filters be cleaned. Rather, they must be changed every three to four months, contingent upon how frequently and what kind of food you cook.
Seven Easy Steps To Clean Kitchen Exhaust Filter:
Although it could seem like a lengthy process, the actual cleaning time would only take a few minutes, depending on how dirty your exhaust filters are and the procedure you decide to use. The entire duration could take up to an hour.
- Remove the metal grease filter or filters.
- Put the filter in a big washbasin or pan.
- Get the cleaning solution ready.
- Soak the filters in the mixture.
- To quickly remove the grease, use a brush.
- Allow them to dry naturally.
- Reinstall them in the range hood.
How Frequently Should Filters On Range Hoods Be Cleaned?
Well, that depends. The experts advise cleaning your range hood filters every two to three months as a general rule of thumb. On the other hand, if you don’t use your hob frequently, it can probably go a few more months without a cleaning. If you use your hob frequently, fry meals frequently, or enjoy cooking with a wok, you might want to boost that to monthly cleanings.
Additionally, according to the experts, you should always clean your filters following a significant cooking occasion, such as a Christmas feast or dinner party. When dirt and oil begin to accumulate to the point that they are visible, it is probably time for a cleaning.
Seven Easy Steps To Cleaning A Range Hood Filter:
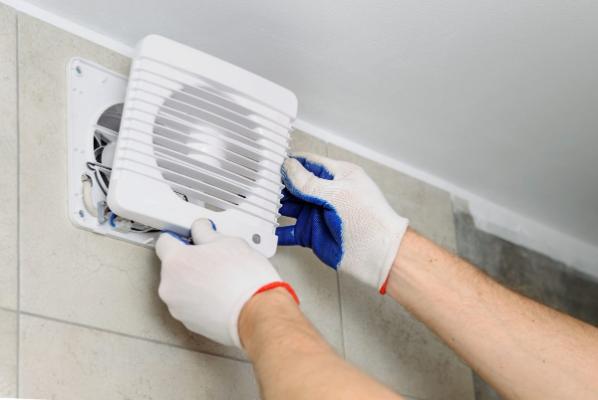
Although it could seem like a lengthy process, the actual cleaning time would be less than 15 minutes, depending on how dirty your range hood filters are and the method you choose. The entire duration could be as long as an hour.
- Remove the metal grease filter or filters.
- Put the filter in a big washbasin or pan.
- Get the cleaning solution ready.
- Soak the filters in the mixture.
- To quickly remove the grease, use a brush.
- Allow them to dry naturally.
- Reinstall them in the range hood.
Removing The Filter For Cleaning:
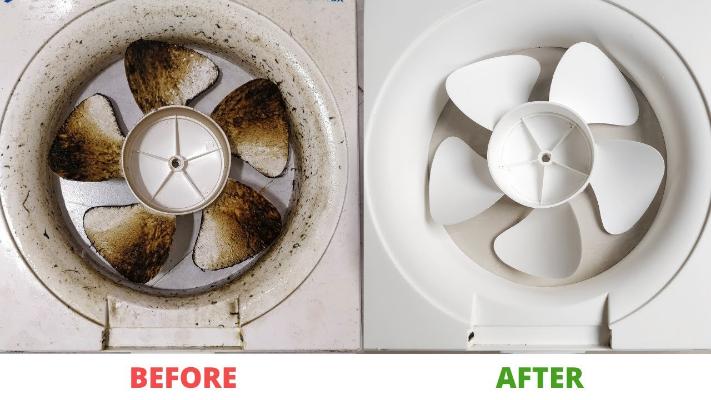
This will change depending on the model you have. On the other hand, the filters are relatively simple to remove from all models. However, make sure you turn off the appliance before you fidget and try to find out how to remove it from the rest of your hood.
Take a minute to examine the range hood’s general configuration. Do your metallic filters show up well, or are they largely obscured? Ascertain that you can see the filters clearly as the first step. Using a screwdriver, remove any plastic or metal covering that covers the base of your hood. There won’t be a protective casing in 95% of the cases.
Once the filters are clearly visible, you should ascertain how they are attached to the remainder of the device. You would observe one of the following things:
- They need to be unscrewed since screws hold them in place.
- The T-Lock or a comparable device secures them.
- a plastic/metal fastener that must be turned to the side.
- Simple latch mechanism that detaches by raising and pressing the lever.
- Rim supports, where the filter-free setting is as simple as pushing up and rotating.
Luckily, the most challenging kind of attachment you will encounter is one that combines a fastener and a support. The only reason I say it’s challenging is that there are versions where the spinning flap is positioned so awkwardly that it will be challenging to get your fingertips in the right spot. Alternatively, you might need to rotate it using a screwdriver or a spoon.
Cleaning The Filters And Preparing The Cleaning Solution:
The cleaning procedure’s steps three through five will now be discussed. Since each of the five ways stands alone and may omit some processes, there won’t be an obvious separation between the steps.
First Step: Dishwasher Detergent.
You will use dishwasher detergent to finish the task instead of dish soap or a grease remover.
- You will use dishwasher detergent to finish the task instead of dish soap or a grease remover.
- Use a blast hose or the tap to wet the filter (hot water works best as it removes some oil).
- The sink or pan that will be free for the next hour is the ideal place to put the wet filter.
- If you want the filter to be spotless, liberally apply and spread dishwasher detergent around it, including the metal rim. Don’t forget to clean every surface.
- Give the filter an hour to sit.
- Put it in a sink with hot water running through it to remove the grease and detergent simultaneously.
- To eliminate any residues of grease, use a brush and additional detergent to scrape the corners.
- You might need to repeat the procedure and let it sit for an additional hour if the filters are really oily.
Step 2: Applying A Degreaser.
When compared to the previous procedure, this one requires a lot more scrubbing. Even though it’s not quite as efficient, the filters are still cleaned.
- Look for a saucepan that can accommodate the grease filter.
- Make sure the filter is fully submerged before placing it in the pot; fill it up to the brim with water.
- Gently bring the water to a boil. Mix this water with a generous amount of degreaser. If there is a lot of oil to be removed, it may take around 20 sprays.
- Put the filter in place and soak it completely. The mixture is slightly acidic, therefore, you should not handle it with your bare hands.
- Immerse the filter in the solution for at least half an hour and up to an hour.
- With the help of tongs, remove the filter and set it in the sink. Scrub vigorously on both sides.
Step 3: A Solution of Vinegar And Baking Soda.
Method 2 isn’t the only one that works; a mixture of baking soda and vinegar also works.
- Fill up a pot that’s big enough to hold the filter with water.
- Heat the water until it boils.
- When the mixture is boiling, gradually add 2 teaspoons of baking soda and 3 tablespoons of vinegar. Instead of adding the baking soda all at once, stir it in gradually.
- Set the filter in place and leave it for at least half an hour.
- With the help of tongs, remove the filter and set it in the sink. Scrub vigorously on both sides.
Step 4: Mixing Hot Soapy Water With Ammonia.
This easy procedure requires only soapy water and ammonia (which isn’t always essential), and it works great if you’ve been cleaning according to your cleaning schedule, which is every other month.
- Fill the kitchen sink halfway with water and add the dish soap. For added convenience, you might want to add some ammonia.
- Before placing the filter in, mix the solution.
- Cleaning the filter requires the use of a brush.
Step 5: Throwing It In The Washer.
Grease filters made of aluminium or stainless steel are dishwasher safe and are standard on most contemporary range hoods. To find out if the filters can be washed in a dishwasher, you may either read up on the product in the specs or get in touch with customer service.
Sure, wash the filters in the dishwasher once every two months if they’re dishwasher safe. Because maintaining this routine will save you the trouble of constantly scouring and purchasing expensive cleaning products.
But, your filters may have become caked with grime and grease if you have neglected to clean them on a frequent basis. The simple act of putting them in the dishwasher will not solve this problem. Rather, you should choose one of the first three approaches given before.
Reattachment And Air Drying:
It is not advisable to use a hairdryer on the filters because of the possibility of electric shocks caused by the metallic material. Consequently, giving them enough time to dry is your best bet. Ensure that they are entirely dry before replacing them; you would hate for the range hood’s wiring to get damp in any way.
FAQs:
How Is A Greasy Exhaust Fan Cleaning?
Add dish soap and baking soda. Add 1/4 cup baking soda and a generous spritz of degreasing dish soap to the hot water. It’s too hot to use your hands, so use a brush to swish around until the water becomes nice and soapy. Add oily screens to water. Put your filthy exhaust fan filters in the water to soak them. Verify that they are fully protected.
How Is A Hood Filter Removed?
Locate and remove the range hood filter first. The filter is usually visible on the bottom of range hoods. The filter on your range hood may have handles that you can just hold and slide backward to remove. There may be a pinching mechanism on other range hood filters that you have to compress in order to slide them out.
How Is The Filter On A Range Hood Cleaned?
Using a microfiber cloth, dry the range hood. Reinstall the filter in the range hood. Fill a large plastic bag or garbage bag with a small amount of ammonia and your range hood filter. Overnight, keep the bag closed to allow your filter to soak. Open the garbage bag in the morning.
Conclusion:
In addition to causing damage to the range hood and raising your electricity costs, a dirty range hood poses a fire and health risk. Warm, slimy, and oily is how a dirty range hood feels. Certain diseases, such as bacteria, thrive in this environment. Additionally, the tiny food particles that fumes carry and then drop on the filters after being carried by the fumes feed the bacteria that they are growing. The areas of the range hood directly above the hob and the area surrounding the grease filters are inevitably going to have deposits of oil and grease. A mild degreaser is an easy way to clean these spots.
